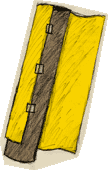
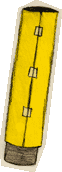
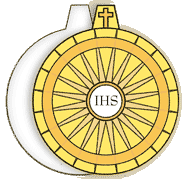
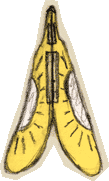
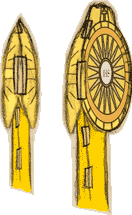
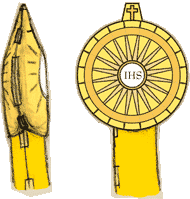
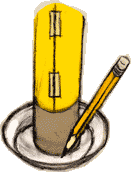
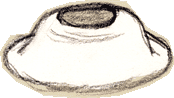
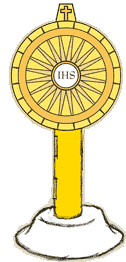
Paper Monstrance

You may have sometimes seen, like during a holy hour or benediction at church, a very beautiful large reliquary that holds the Sacred Host in the center and displays It for all to see. This is called a Monstrance. In this craft, you will be able to make your very own paper Monstrance. When you’re done, you can keep it somewhere close and where it’s easy to see. This way, your beautiful craft will help remind you to think of, pray to and - most especially - to love our dear Jesus, Who is waiting for you in the Holy Eucharist.

This craft is also a wonderful activity for those who are preparing to, or have already received, their First Holy Communion.

Make Your Own!

1. Get your parents’ permission and say a prayer to Guardian Angel for help.

2. Gather all your supplies:

  • Your printed off Monstrance FRONT and BACK images. (NOTE: These images are included with the print-out instructions for this craft. To download these instructions, right-click on this link and select "Save Link As..." or "Save Target As..." If you only need the FRONT and BACK images, select to only print off pages #5 and #6. And remember to always print on 'Draft'!)
  • Coloring Materials - Crayons, Markers, or Colored Pencils
  • Construction Paper - Yellow or Orange
  • Empty Paper Towel Roll
  • Stapler or Tape
  • Scissors
  • Pencil
  • A Plate or Bowl made of either Paper or Styrofoam

3. Color in your printed off Monstrance FRONT and BACK.

4. When they are colored in the way you like, cut out the images along their dotted lines.

5. Now get your empty paper towel roll, and tape a piece of the colored construction paper around it to cover up the brown. Your paper towel roll will become the 'handle' of the Monstrance. You can choose if you want it to be covered with yellow or orange construction paper. Leave about an inch of the paper towel roll left unpapered at the bottom of the tube. This will be the part that will be inserted into the base.

6. With your paper towel roll all ready, you now need to attach the top of the Monstrance to the handle. Take your Monstrance FRONT and BACK images and line them up together, with the blank sides facing in towards each other, and the picture sides both facing out.

7. You are now going to attach them together. Using either the stapler or tape, go around the edges of the Monstrance FRONT and BACK images and attach the 2 pieces to each other. You can connect them on the top if you want - BUT BE SURE TO NOT COMPLETELY ATTACH THEM TOGETHER ON THE BOTTOM. This is where you will slip in the handle, so leave extra space until the next step.

8. Slide the paper towel roll in through the gap you left at the bottom of the joined Monstrance FRONT and BACK images. You can push it in as much or as little as you like - this will make for a longer or shorter 'handle' in the end. The important thing is to push the roll in enough roll secure the Monstrance image to the handle.

9. When you have the handle at the length that you want it, take the two sides of the image that are right next to the roll and pinch them together. Staple or tape the papers together here, and do that on each side of the roll. You are securing the papers tightly beside the roll. If you have done it correctly, you should be able to hold the paper towel roll by itself and the Monstrance image will stay in place on the roll. Now it is starting to look like a Monstrance!

10. Now you are going to prepare the ‘base’ of your Monstrance. This will be either a paper plate or a Styrofoam bowl. A bowl might be more stable than a plate, but if the plate is Styrofoam it should be sturdy. Either a plate or a bowl made of paper or Styrofoam – it simply whatever you choose or think will be more stable. In these instructions, we will be using a bowl.

11. Take your bowl (or your plate), and place the roll right in the center of it. What you are going to do is take your pencil now, and lightly trace around the roll. Remove the roll, and you should now see a circle equal to the width of the roll.

12. Carefully using your scissors cut out the hole that you drew. In this case, it is better if you cut it a little too small, because then the paper towel roll will push through and fit snugly inside it. You definitely do not want to cut a hole that is in any way too big. If you should happen to cut a hole which is too large, try taping a little strip of your construction paper onto the bottom of the roll (the part you left unpapered in the beginning) to widen your roll again, so that it will fit in the hole nice and tight. Glue can also be used to fix this problem.

13. When your hole is cut out, take the bowl (or plate) - and turn it upside down. Now you have a base for your Monstrance!

14. Take your Monstrance so far (the handle with the attached images to it) and push it into the hole you cut out. Now on its base, the paper towel roll will be able to stand on its own - and you have just finished making your very own Monstrance!

15. Be sure to thank your parents and your Guardian Angel for their help.

16. Find a nice safe place for your completed Monstrance somewhere in the house (for example, a prominent place in your bedroom, living room, etc.). If you want, maybe you can set up a little shrine or altar to place it on, and have flowers in front of it. You could also include it as part of your May Altar for Mary during Her month.

Wherever you keep your Paper Monstrance, be sure to it as a daily reminder to think about and remember Our Hidden Jesus, Who is always there for us - waiting for our prayers, our attention and our Love!